
Affiliate link cloaking is when you hide the tracking URL from view on your website. Instead of displaying a long and “ugly” link, you can use your own URLs to make money while hiding pertinent data. There are actually a few good reasons why using an affiliate link cloaker would be ideal.
Using affiliates is just one of many ways to make money from your website. It can be quite lucrative, especially if you have a lot of inbound traffic.
In this article, we’re going to show you how to use an affiliate link cloaker and what it can do for you. There are more reasons to use it than to just make your links look pretty.
Why You Should Use an Affiliate Link Cloaker
Link cloaking is not a new piece of technology. In fact, many people have been using variations of it for years now. Every time you use a URL shortener, you’re essentially cloaking the link. What about the ones that come from affiliates, though?
More Presentable
A lot of people are quite selective when it comes to making their website look nice. This includes the appearance of outbound links. Take a look at the following two URLs:
- https://www.youraffiliatesales.com/products/?product_id=987&affiliate=111
- https://www.yourwebsite.com/refer/productname
Both of these links have the exact same purpose. The only real difference is that the affiliate information and your identification number with the company are hidden from visitors. It makes the site look more professional should someone see the link when clicking on it.
Protecting Information
Using link cloaking can keep your information secure while preventing hijacking. All of the important information that is used to connect to your affiliated company is hidden from view. The name of the organization and your affiliate ID number really doesn’t need to be out in the open for all to see.
Statistic Tracking
Many cloaking plugins will keep track of links and click-through rates. This will help you see statistics regarding certain affiliates and make sure that your account is receiving credit for the clicks and possible sales. Plus, it is helpful when developing strategies regarding which affiliates are working on certain pieces of content.
Using ThirstyAffiliates to Cloak Your Links
WordPress has a large number of plugins that will hide your links from view. Each comes with its own benefits and most of them work exceptionally well.
In this tutorial, we’re going to use the plugin, “ThirstyAffiliates.” Not only does it have link cloaking capabilities, but it’s also full of features you’ll find useful when monetizing your website.
To use ThirstyAffiliates:
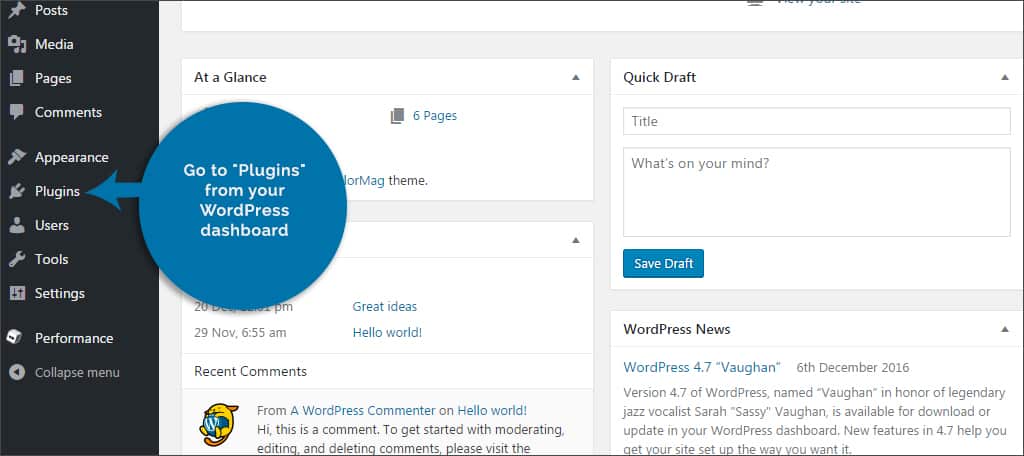
Step 1: Go to “Plugins” from your WordPress dashboard.
Step 2: Add a new plugin and search for, “ThirstyAffiliates.”

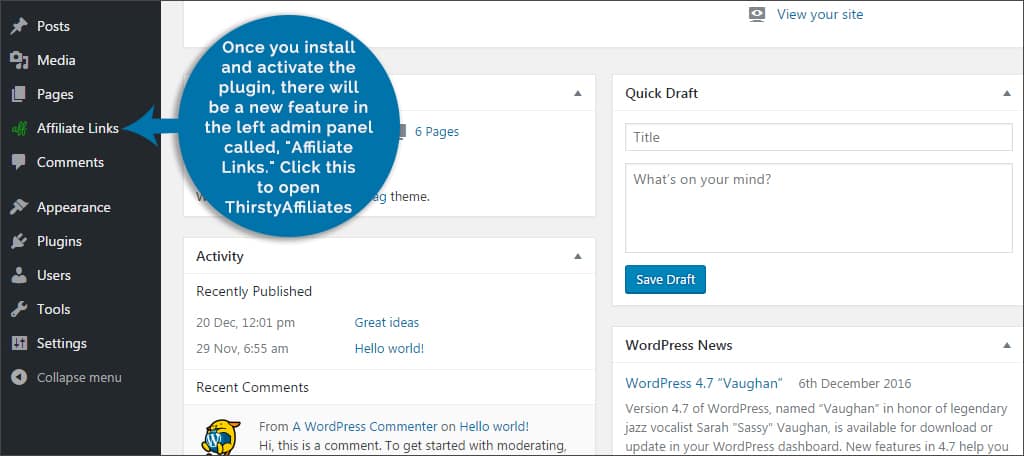
Step 3: Once you install and activate the plugin, there will be a new feature in the left admin panel called, “Affiliate Links.” Click this to open ThirstyAffiliates.
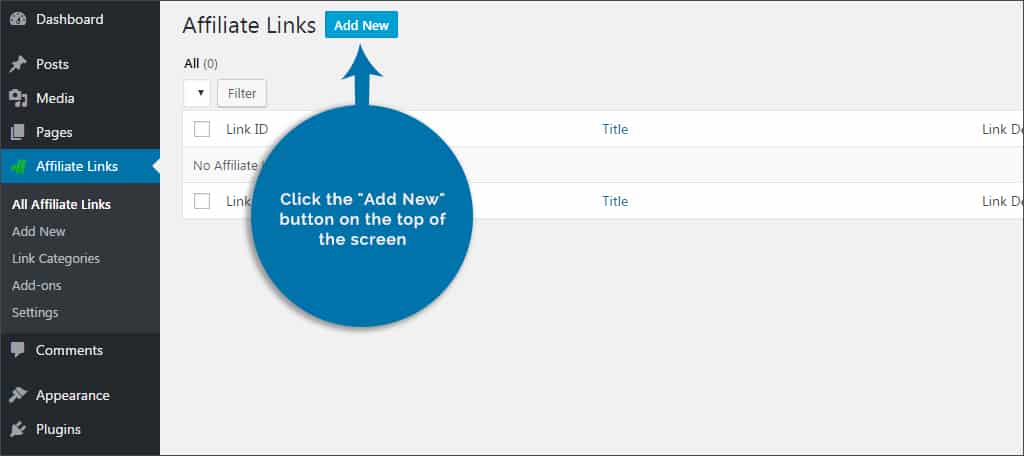
Step 4: Click the “Add New” button on the top of the screen.
Step 5: Input a name for the affiliate. This is for identification purposes for yourself. You can make this anything you wish. We suggest using something easy to remember, such as the affiliate company’s name or the specific product.

Step 6: Paste the destination URL. This is the actual URL you receive from the affiliated company, ie. the “ugly” link.
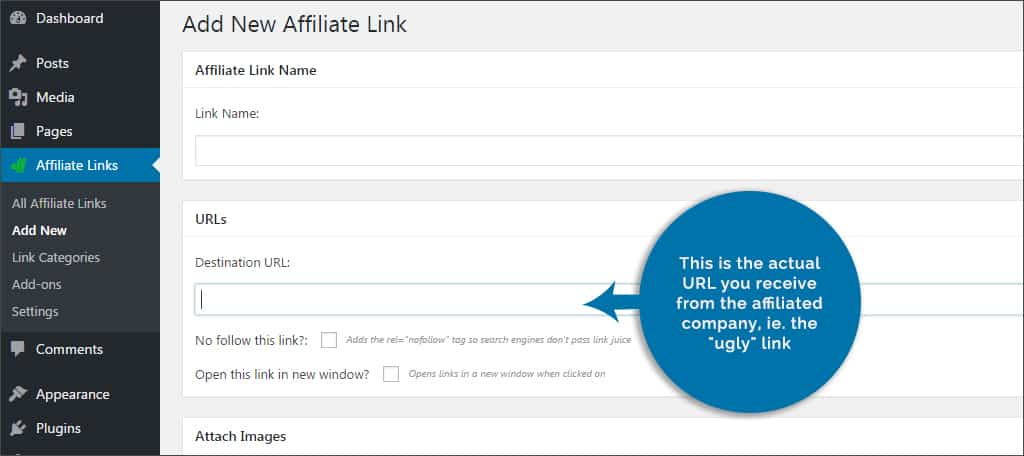
NOTE: You also have options to add nofollow and opening in a new window. Nofollow links are not indexed by search engines, which doesn’t add your “link juice” to the affiliate. These are both excellent options to select.
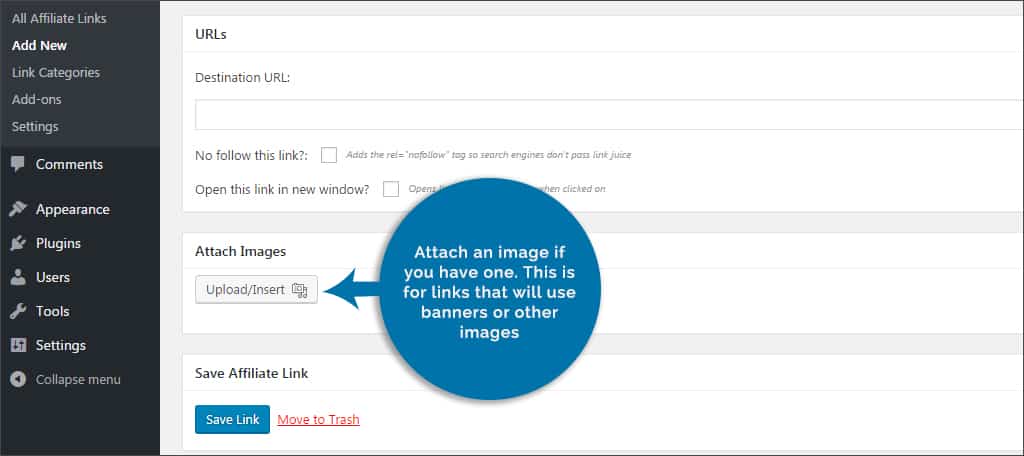
Step 7: Attach an image if you have one. This is for links that will use banners or other images. If this is going to be linked to text in your content, then you will not need an image.
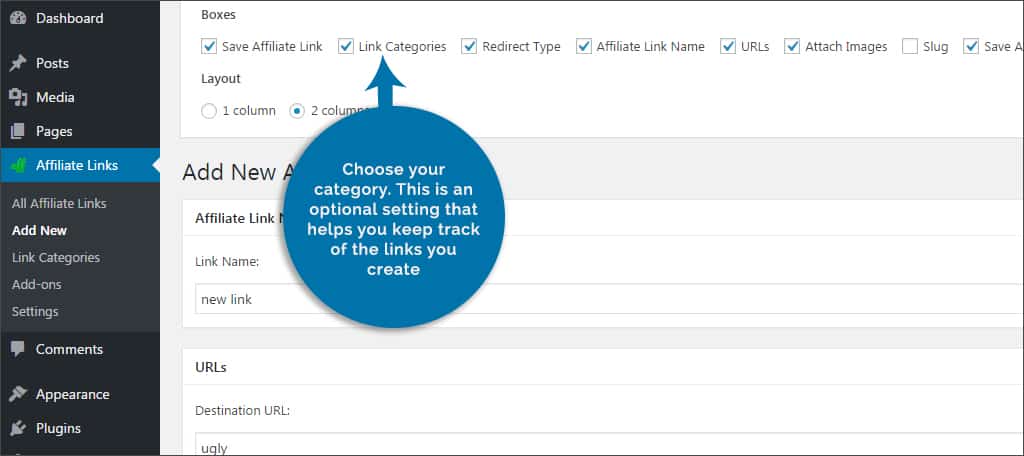
Step 8: Choose your category. This is an optional setting that helps you keep track of the links you create. You can assign certain affiliates to be a part of a specific category, which is useful when determining what kind of products your visitors enjoy more on your site. Otherwise, you can leave this blank.
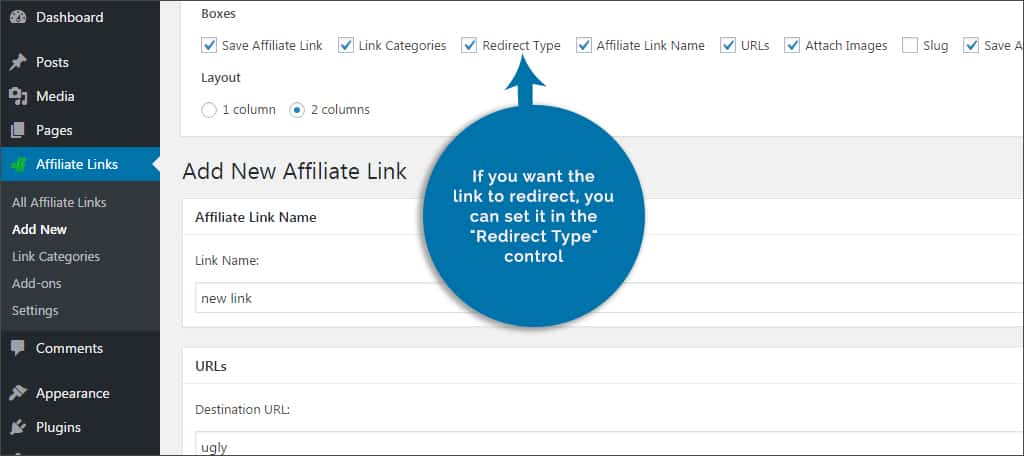
Step 9: If you want the link to redirect, you can set it in the “Redirect Type” control. You can set these for permanent, temporary and temporary alternative. By default, ThirstyLinks uses 301 Permanent redirects. This is also an optional entry and can be set up in any way you wish.
Step 10: Once you’re done filling out the page, click the “Save Link” button on the bottom.
Step 11: Go into any post or page you wish, or create a new one.
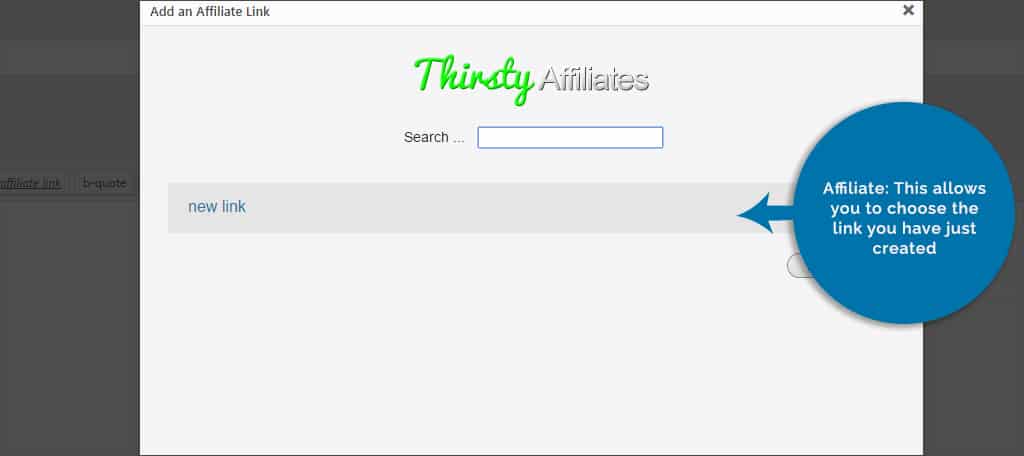
Step 12: Both the Visual and Text editors in WordPress will have new buttons installed along the tool bar. These are “Affiliate Link” and “Quick Add Affiliate Link.”
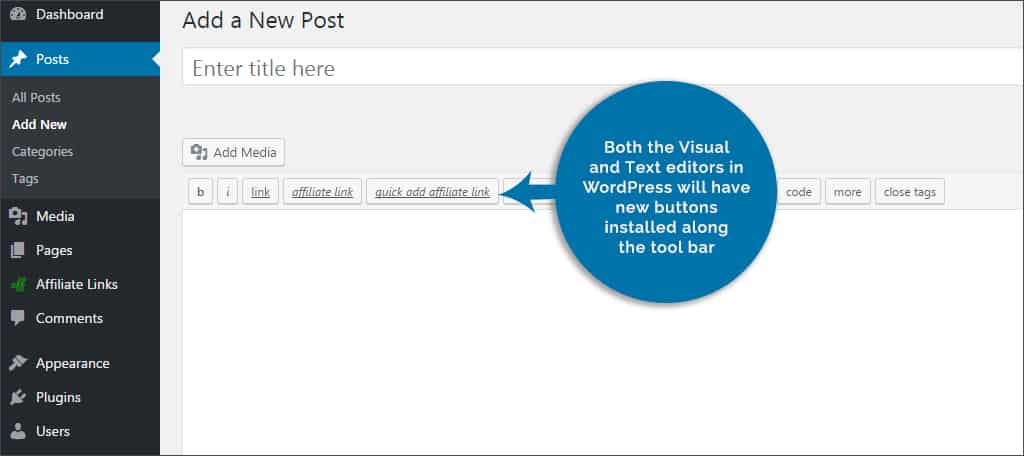
Affiliate: This allows you to choose the link you have just created.
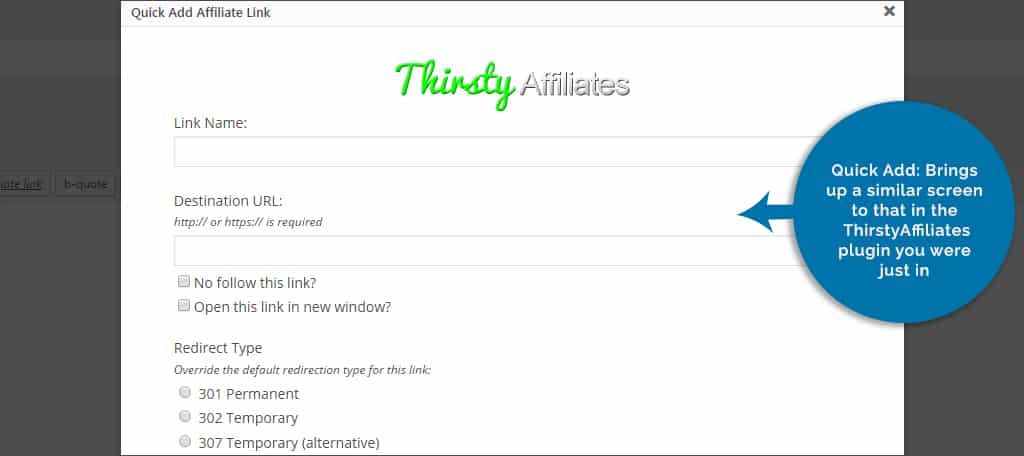
Quick Add: Brings up a similar screen to that in the ThirstyAffiliates plugin you were just in.
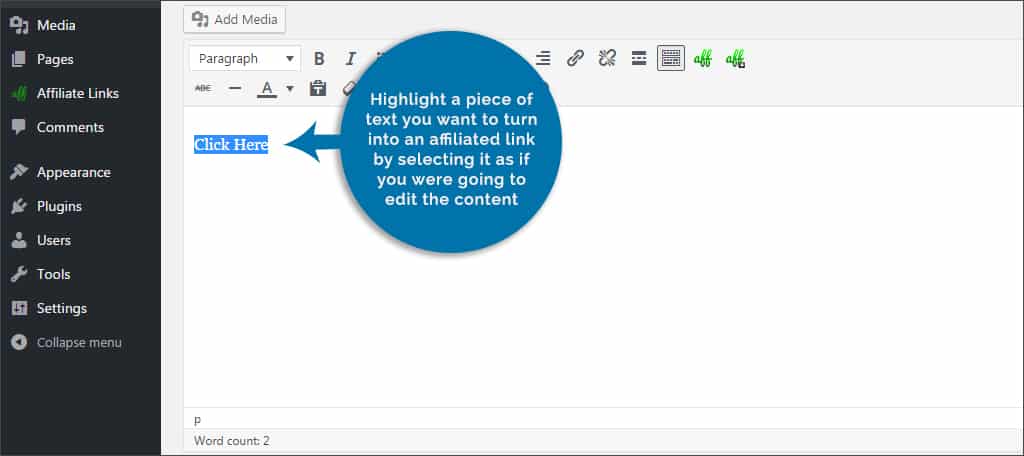
Step 13: Highlight a piece of text you want to turn into an affiliated link by selecting it as if you were going to edit the content.
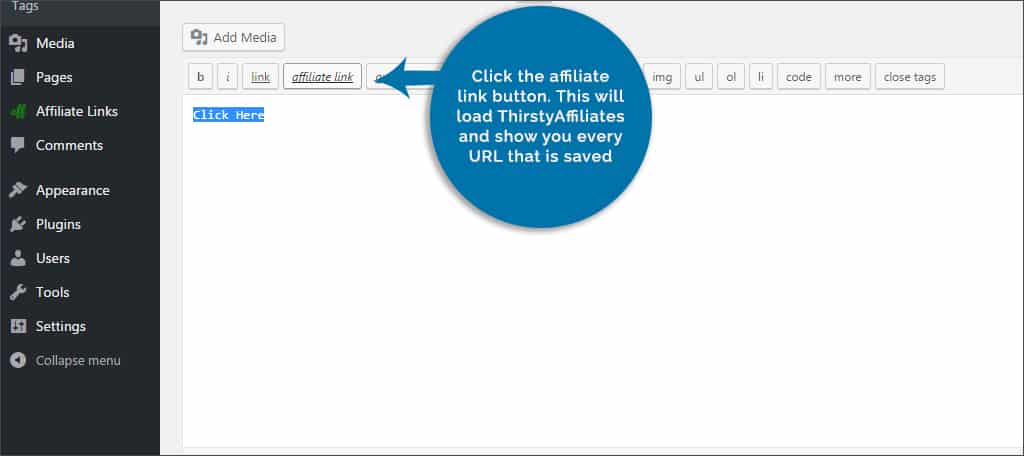
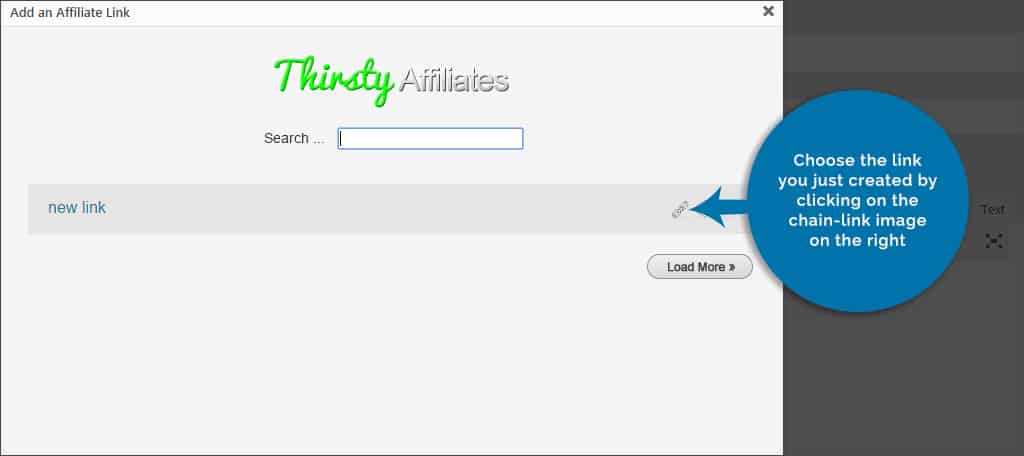
Step 14: Click the affiliate link button. This will load ThirstyAffiliates and show you every URL that is saved.
Step 15: Choose the link you just created by clicking on the chain-link image on the right.
Step 16: Your text will then become linked to the target URL.
That’s all there is to it. Now, the URL is hidden from view and the link is live while aiming at your affiliates.
ThirstyAffiliates and Shortcodes
ThirstyAffiliates is also equipped to input shortcodes. Instead of choosing the chain-link image, you can click on the gear with a green arrow. This will input the affiliate link as if it were a shortcode instead of connecting text. This is ideal if you assigned an image when creating the affiliate URL.
Shortcodes can also be used to streamline the experience of using affiliates. For instance, let’s say that you are using an affiliate to sell a product on your website. Later, you find another affiliate selling a similar product with a better payout to you. Because you are using shortcodes, you can change the URL you have saved in ThirstyAffiliates, which will change every post and page you used its shortcode in.
Add-ons for ThirstyAffiliates
There are many ways you can get more out of ThirstyAffiliates with add-ons. Keep in mind that these are not free and require a purchase to use them. Here are just a handful of things that you may be interested in when setting up your own links in the system.
Stats
The Stats add-on will give you the ability to track clicks for your affiliate links. It comes with a dashboard allowing you to see which categories are receiving the most visits and which URLs have been the most fruitful for your campaign.
Autolinker
Autolinker is a nice add-on because you can set it to create affiliate links automatically based on certain keywords or phrases. For instance, you could set something like, “going to town” to automatically be linked to an affiliate anytime you use that specific phrase in your content.
Google Click Tracking
For those who like to use Google Analytics to track data, the Google Click Tracking add-on connects those events. This plugin will automatically input the approval code for Google and show stats right into your Analytics account.
Hiding affiliate links from the general public has many uses. Whether you want to make everything look nice or want to safeguard your identification number, keeping the URL hidden is relatively easy with the right plugin. When it comes time to monetize your website, take advantage of the things you can do to improve your experiences.
What plugins do you have to manage your affiliate accounts? Do you prefer to use banners or text when creating links for your affiliates?