
PowerPoint has positioned itself as the go-to software when it comes to creating presentations. However, that doesn’t mean there are no other options. And when it comes to WordPress, there are several ways to create presentations to display on your site.
WordPress has an impressive selection of plugins to choose from, and one such that excels at creating presentations is Smart Slider 3. Another option would be using the Presenter plugin to create slideshows.
Both of these are excellent alternatives to using PowerPoint and let you build slideshows directly into WordPress itself.
Today, I will demonstrate how to do both of these to add presentations in WordPress without using PowerPoint.
Why Add Presentations in WordPress?
Presentations, or slideshows, are versatile tools that allow users to display all types of information in an easy-to-understand format.
One of the most common uses would be for webinars or educational content. In fact, slideshows are used throughout most classrooms, thus, it’s one of the best ways to simulate a classroom online because it invokes familiarity.
Presentations allow you to include facts, statistics, images, and even videos, thus, you can use them to cover any topic. Users can also download their own copy to write notes on, especially on tablet devices.
Of course, this isn’t the only reason why you might want to embed a presentation in WordPress.
Portfolios are another common website architecture. And you can create galleries to show off your work, some users, like to create presentations or slideshows for particular types of content.
For example, a graphic designer might want to show off their ability to make logos in one slide show, and their ability to make banner images in another. This makes it easier for customers to find example work that they are interested in.
Presentations are also more sharable than other forms of content. The bottom line, there are a lot of uses for them.
How to Create Presentations in WordPress with Smart Slider 3
Smart Slider 3 is a popular plugin with over 900,000 active installs and specializes in making customizable slideshows. They can contain any form of media from text to video and everything in between.
The plugin also provides a great selection of templates users can use to get a head start. They have excellent designs that are great fits for most sites, but you can also start with a blank slide if you want.
This allows you to create your own style or upload your own background image on the slide. Overall, the tool is highly customizable and is accessible for any skill level. As such, it is one of the best options in WordPress for building presentations.
Step 1: Install Smart Slider 3
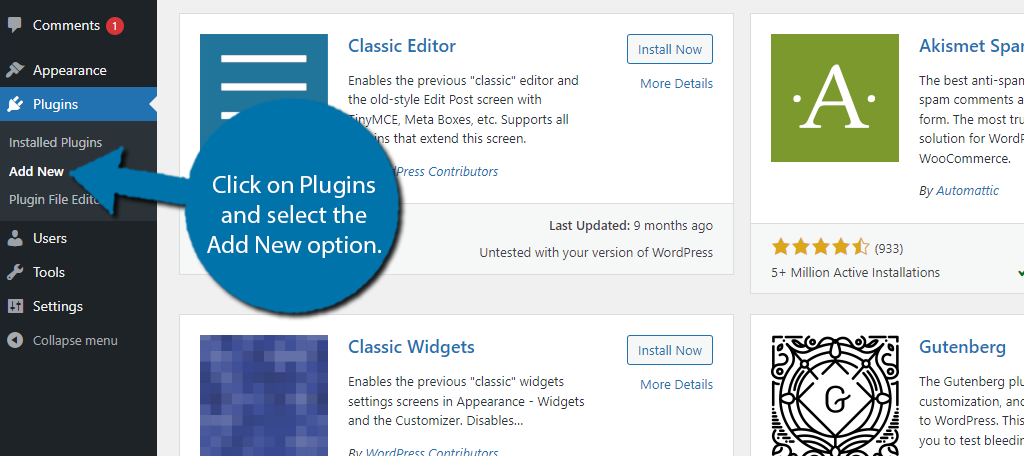
Let’s start by clicking on Plugins and selecting the Add New option on the left-hand admin panel.
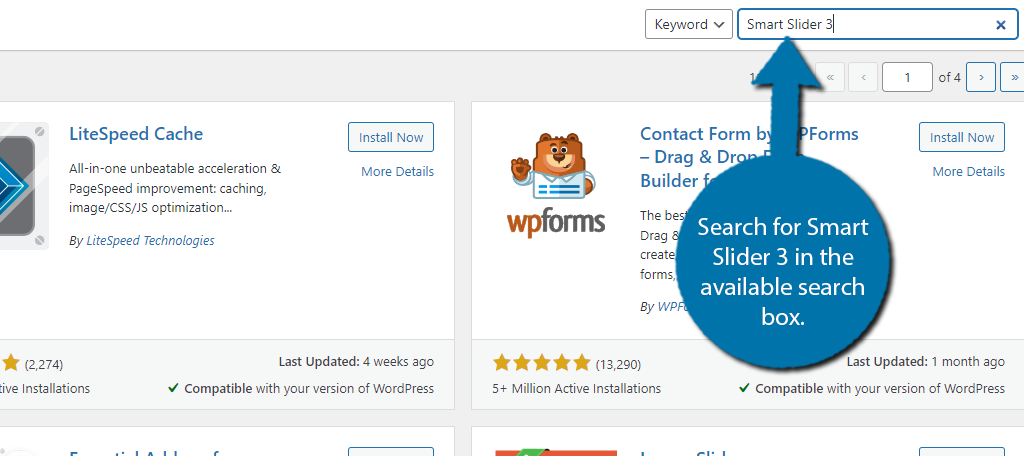
Search for Smart Slider 3 in the available search box. This will pull up additional plugins that you may find helpful.
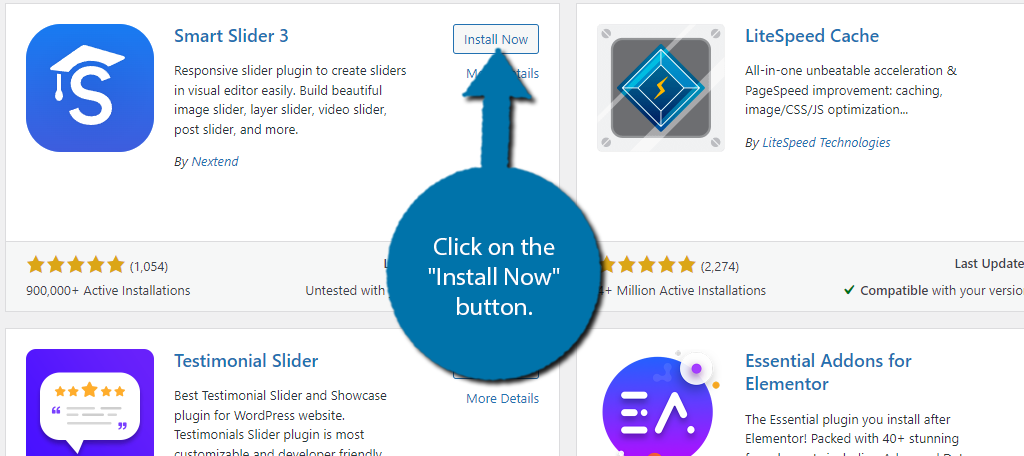
Scroll down until you find the Smart Slider 3 plugin and click on the “Install Now” button and activate the plugin for use.
Step 2: Configure the Settings
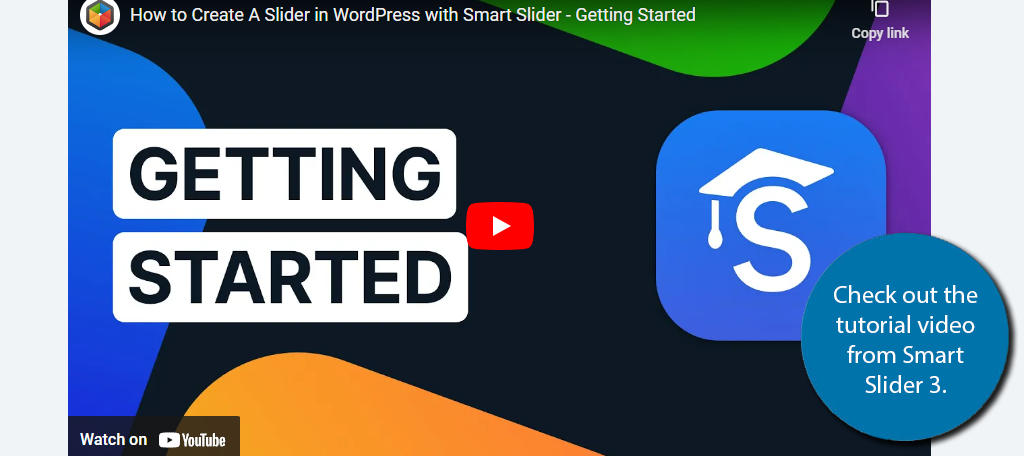
The plugin allows you to start building presentations immediately after activating the plugin. However, when you first access the plugin in WordPress, you will be presented with a video tutorial that shows you how to use the plugin. I highly recommend watching this.
There are also some settings to configure, which is where I recommend starting.
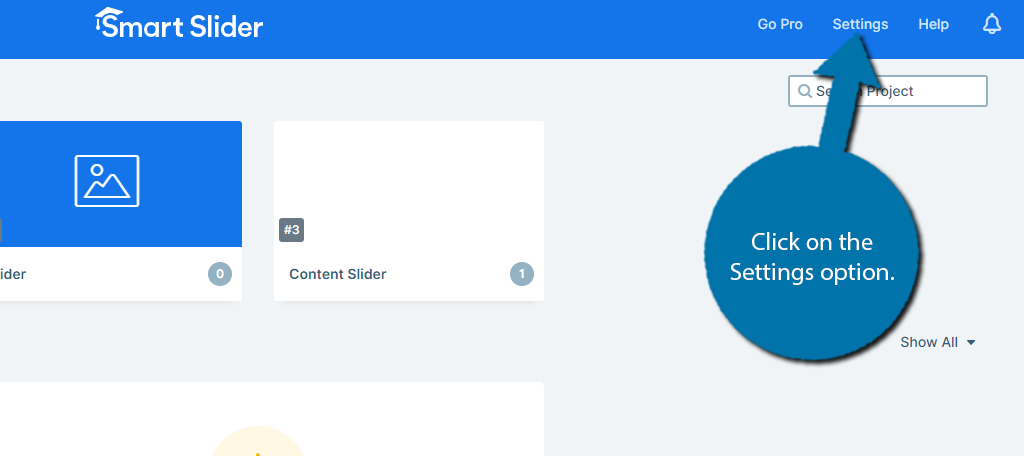
To find them, click on Smart Slider and select the Dashboard option. In the top-right corner, you will see a Settings option, click it.
The settings are broken up into four tabs with multiple sections for each of them. There is nothing complicated about them, and most just consist of some easy options to configure.
Let’s get started with the General tab.
General Tab
The first option is on by default and the Automatic Update check option. Essentially, this will check when you update a slide and save the changes for you. It’s quite a handy option, so feel free to toggle it if needed.
The next two options are for Alternative Save Slide (helps if you encounter any saving issues) and Preview in New Window. Both are off by default, and you can use the switch to toggle them.
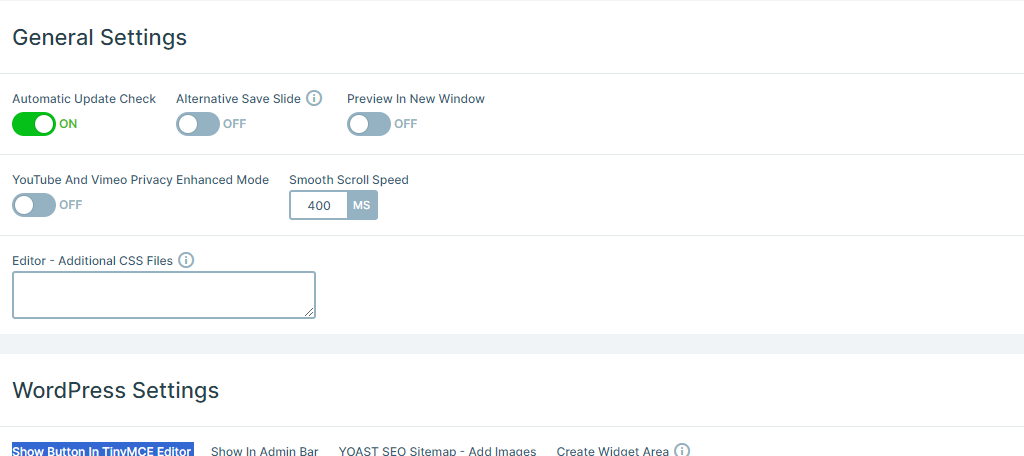
The following options are for adding YouTube and Vimeo Videos to your slides. It enables YouTube’s Privacy Enhanced Mode. This means when someone watches a video on your site, it will not be considered in their video recommendations.
This has its pros and cons, and by default, it is off. Feel free to enable it if you desire.
Below this, you can add some custom CSS to the editor. This allows you to better match the rest of your theme, so use it if necessary.
The next section is for the WordPress settings. Here, you will find options to show a button in the TinyMCE Editor, to show in the Admin Bar, to include the presentation in the Yoast SEO sitemap, and to use iFrames.

Most of the options are on by default, but feel free to toggle them on or off.
Next, you can customize the breakpoints of the presentation. Essentially, these are the values that the plugin recognizes if the user is on a smartphone, tablet, or desktop. The default values are fine, and I recommend using them but feel free to change them.
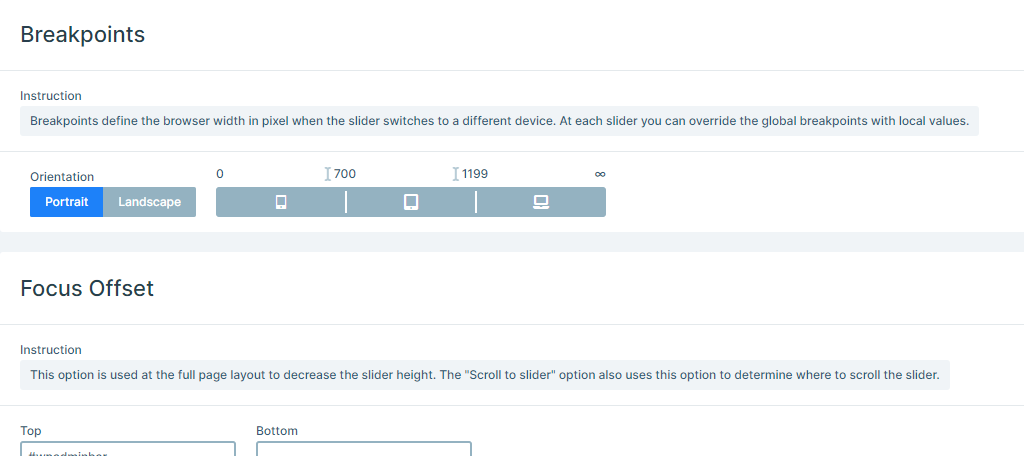
The final two sections are for the Focus Offset and Translate URL. For the Focus Offset, this allows you to decrease the slider height in a full-width layout. The Translation URL allows you to send users to a different URL where a translated version resides.
This covers the General settings.
Framework
The Framework section doesn’t contain much. The first option is to use a Protocol-Relative URL, which just means loading a page without the HTTP or HTTPS in the URL. This is one by default, and I recommend leaving it that way.
Next up would be the Header Preload option. This tells the web browser to preload your presentation in WordPress. If your presentation is the main content on a page or post, this option should be on.
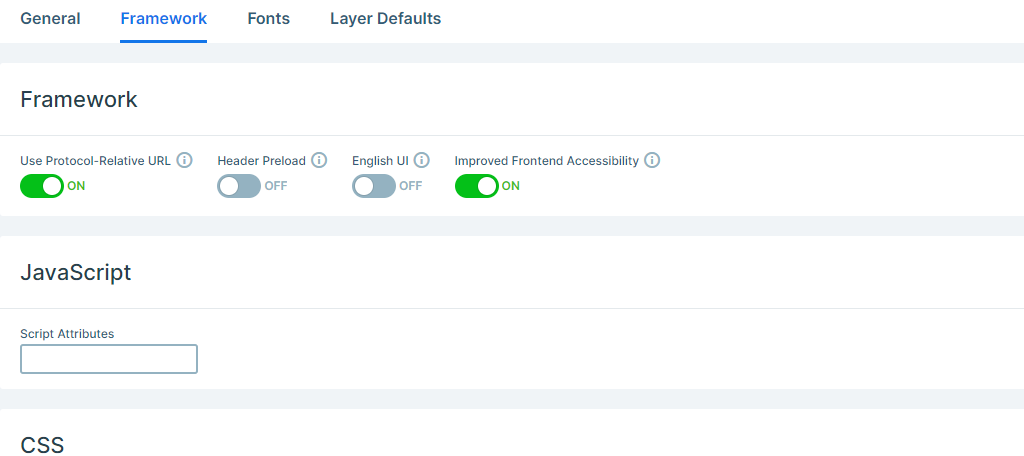
The English UI option is pretty straightforward, it just ensures the UI is always in English. There is also the Improved Frontend Accessibility option.
This ensures that buttons are always visible to users regardless of where they scroll.
You will also have an option for adding JavaScript and to enable Async Non-Primary CSS.
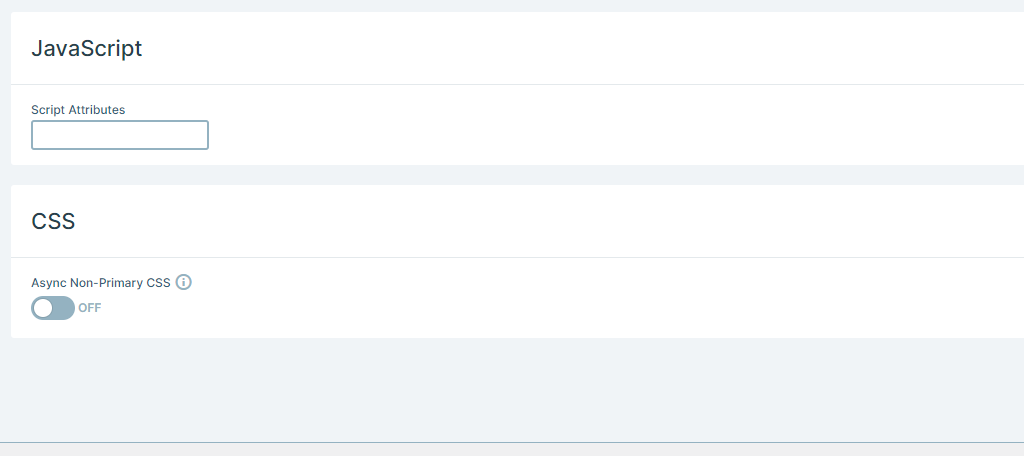
That concludes the Framework section.
Fonts
There’s not much to say here. You can select what the default font option will be when making presentations in WordPress, and select which fonts will be available when editing the slideshow.
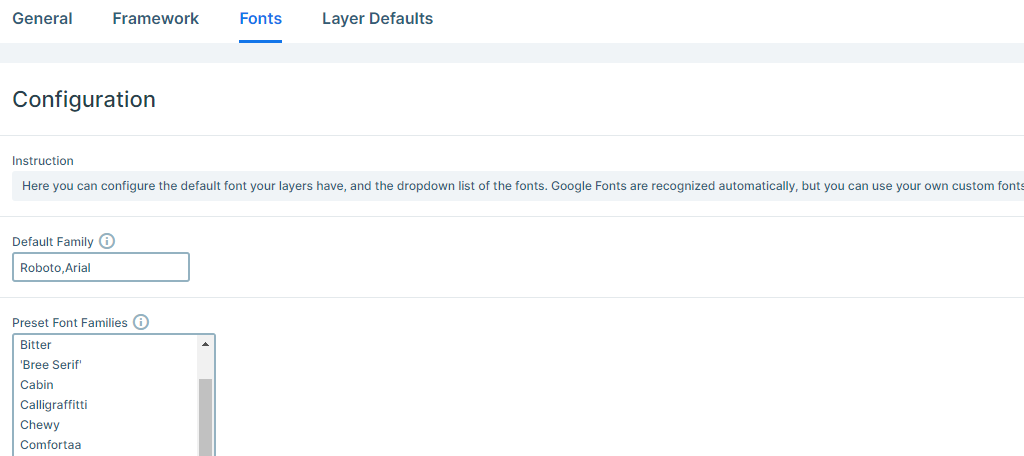
This can help you control what choices your authors make and ensure that only easily readable fonts are displayed. It’s worth pointing out that is a good policy to be consistent and always use the same font on your site.
There are also options that allow you to load Google Fonts on the frontend, Save fonts locally, or save them on the backend. You can also choose which styles are available, which just really boils down to how bold your Bold is or how italic, your Italic is.
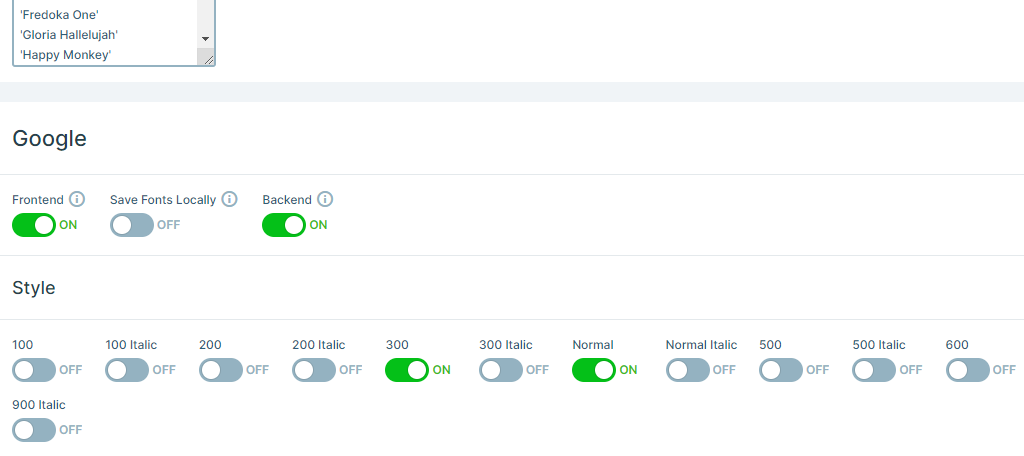
Just toggle the switch to make it selectable and you’ll be able to choose it when creating a slide show.
That concludes the Fonts section.
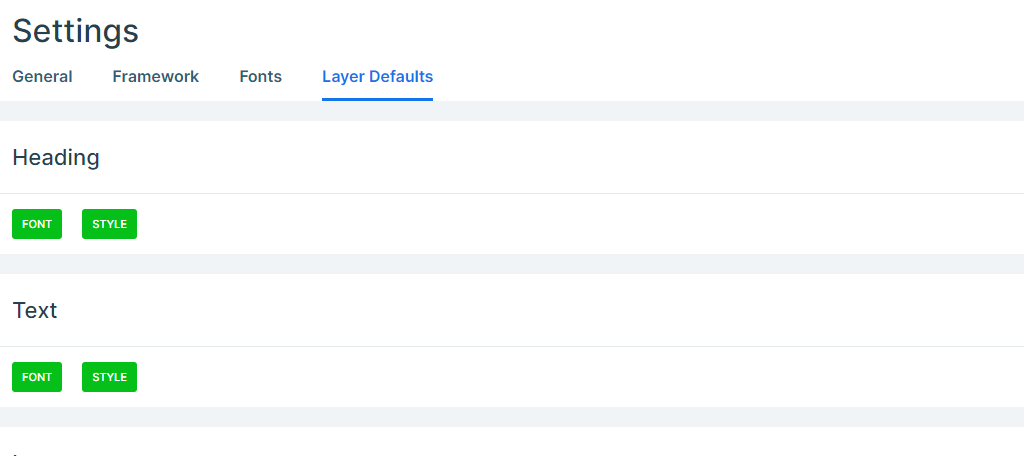
Layer Defaults
This section is all about designing how certain elements act at default when they are added to the slideshow. This is for the Heading, Text, Images, and Buttons.
You can configure the default Font and Style by clicking on the correlating button.
Doing so will reveal Font settings for the element, or style settings, depending on your choices. Simply configure them to meet your needs.
It is possible to change these when you add them to a slideshow, so no pressure on getting it right.
Step 3: Start A New Project
Alrighty. With all of the settings configured, it’s actually time to start making a slideshow in WordPress.
Go to the Smart Slider 3 dashboard and click on the New Project option.
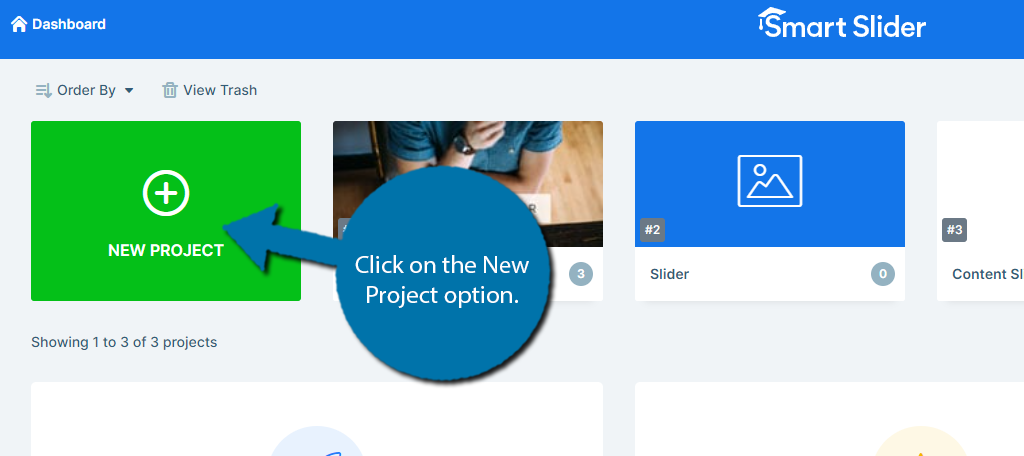
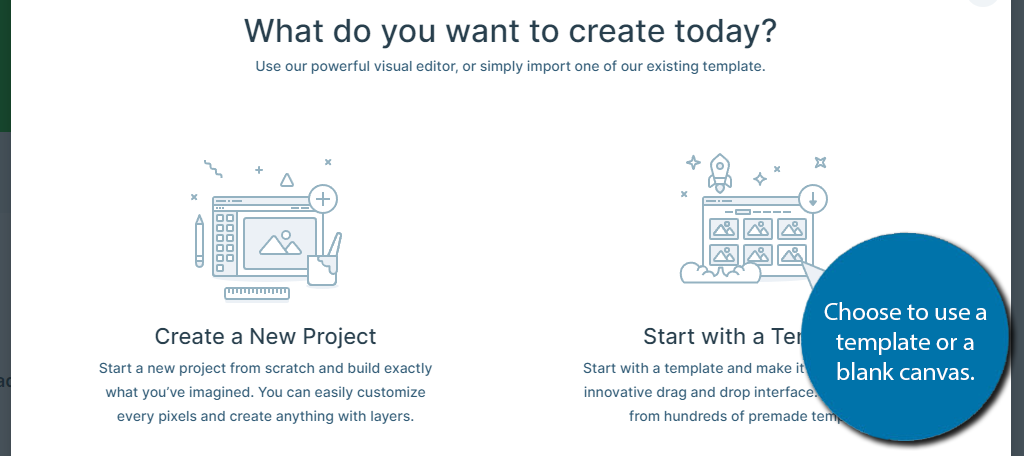
A popup will appear asking if you would like to start from a blank slide or use a template. I will use a blank slide for this tutorial, but I highly recommend checking out the robust library of templates.
Just remember some of them are locked behind the Pro version.
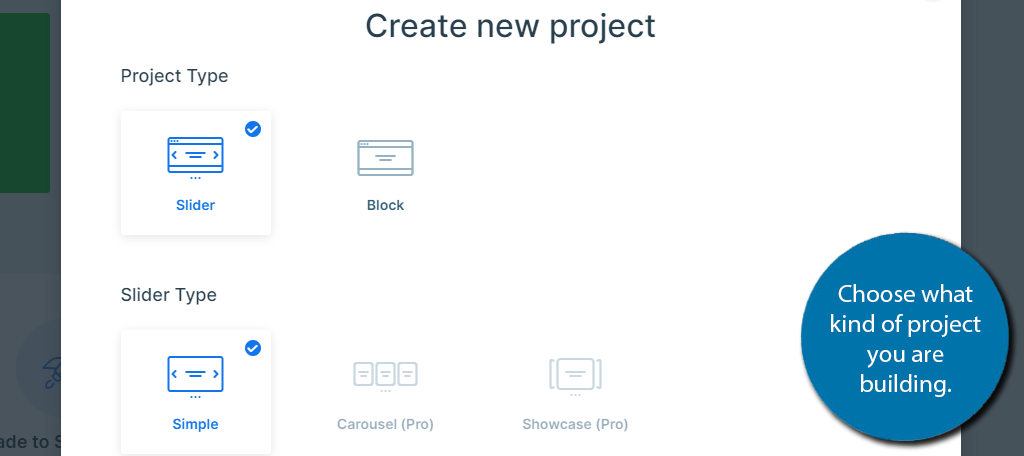
Continuing with building a new project, you will be asked if you are building a slideshow or an individual block. If you choose the slider, then you can customize the way it behaves.
There are also some options for picking the dimensions of the slideshow.
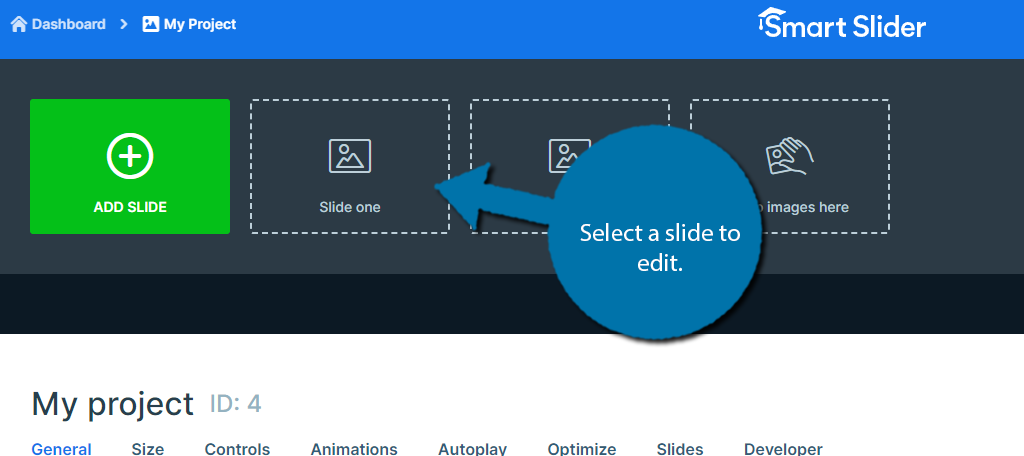
This will create a project that you can start building. The Project itself has its own dashboard. You can access any of the slides for your presentation here.
You can also find the shortcode and PHP code to display it (more on that at the end).
Step 4: Choosing A Slide
At the top of the project dashboard, you can select what slide you are working on. There is also an option to add another slide. The slides here can be rearranged by dragging them in the desired order.
Go ahead and select one of the slides to edit.
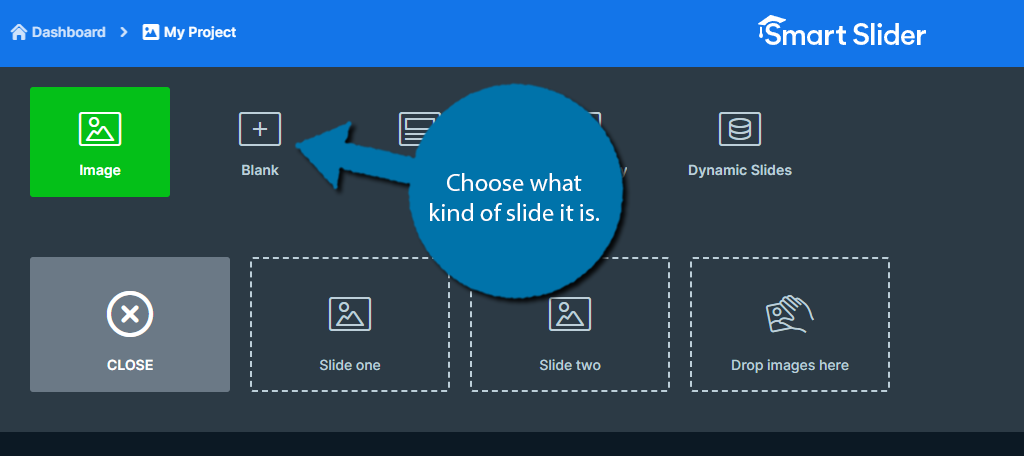
Some more options will appear above the slide you chose. You can select if it will be just an image slide, a blank one that you can fill in, a post slide that lists off posts on your website, a static overlay, or dynamic slides.
In this case, I’m just picking a blank slide as it allows me to show off more features.
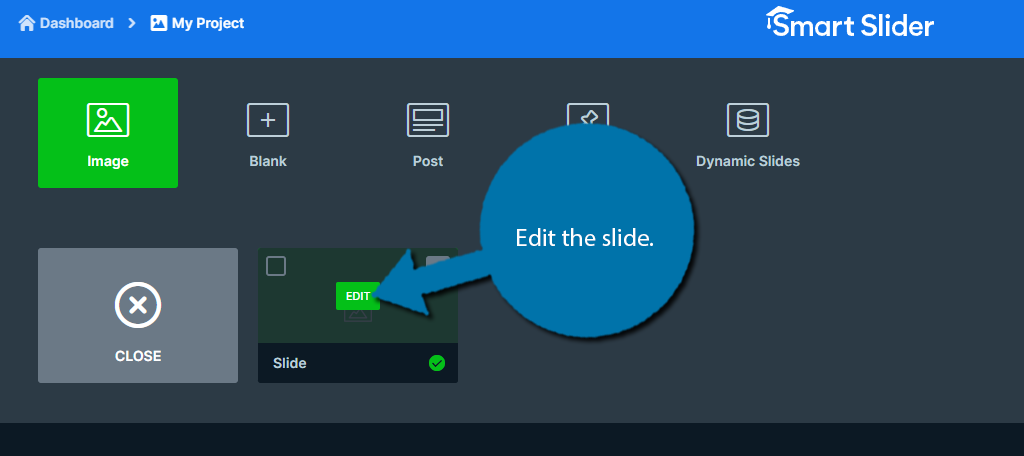
You can now select the slide to edit it.
Step 5: Customizing the Slide Background
The Smart Slider 3 editor is quite robust and different from other slider editors on the market. As such, there is a bit of a learning curve. That said, it’s nothing too major and I’m confident anyone can use this tool.
When I said this was a blank slide. I meant it. There is absolutely nothing here. Let’s start by changing the background of the slide.
Note: There are options for Animations, but those are a Pro feature and will not be covered in this tutorial.
You have two options. The first is to just add a basic color in the background like blue or black, or better yet, you could use a gradient option to mix two colors. The other option is to use a background image.
If you are looking for slide designs like PowerPoint or Google Slides, one thing I can recommend is to make your own, save them as an image, and add them as the background image. This is quite easy to do in Photoshop.
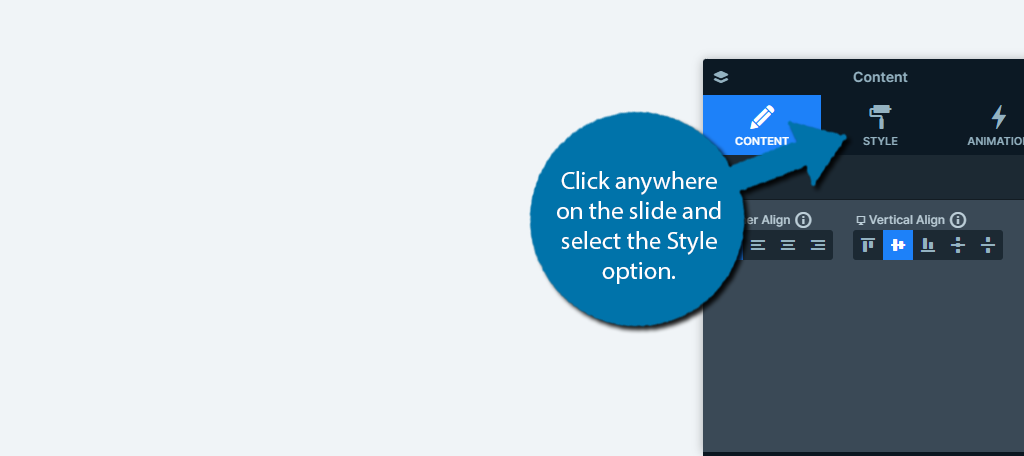
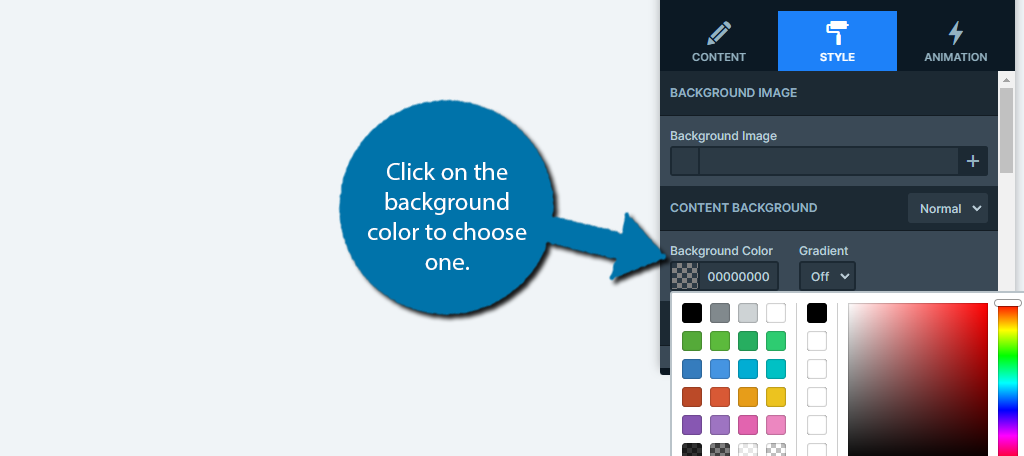
To do any of this, just click anywhere on the slide and select the Style option.
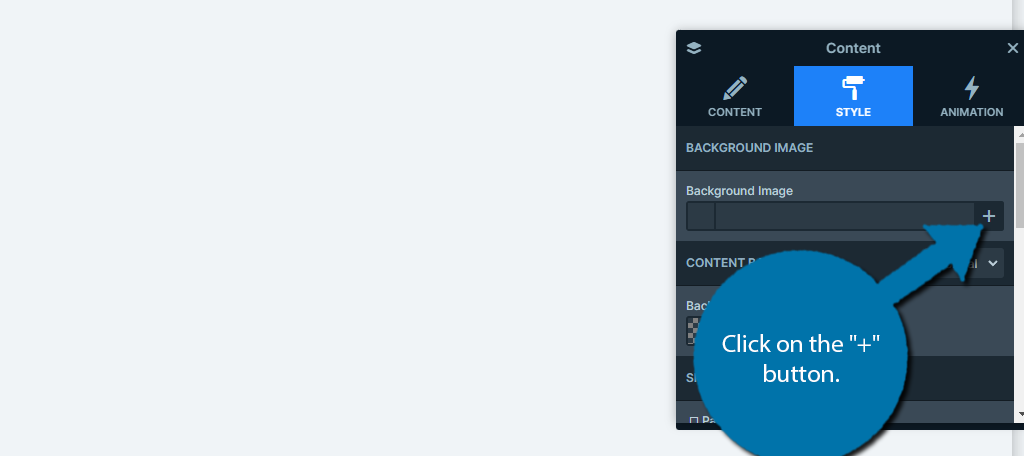
The first option allows you to add a background image. To do so, simply click on the “+” button to select an image from the media library.
Alternatively, below this option, you can choose a background color. Simply click on the color option and use the color slider to make your choice or enter the Hex value manually.
Step 6: Adding Content to the Slide
Now that the slide is decorated, it’s time to add actual content to it. Luckily, adding elements to a slide is quite simple, and in most cases, the process is identical for any element type.
Let’s demonstrate this with the Header.
Click on the H option on the left-hand side.
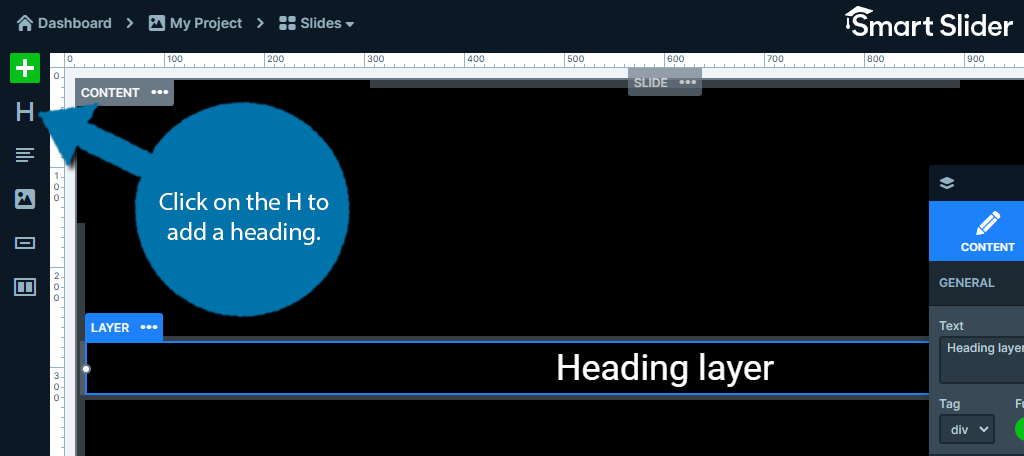
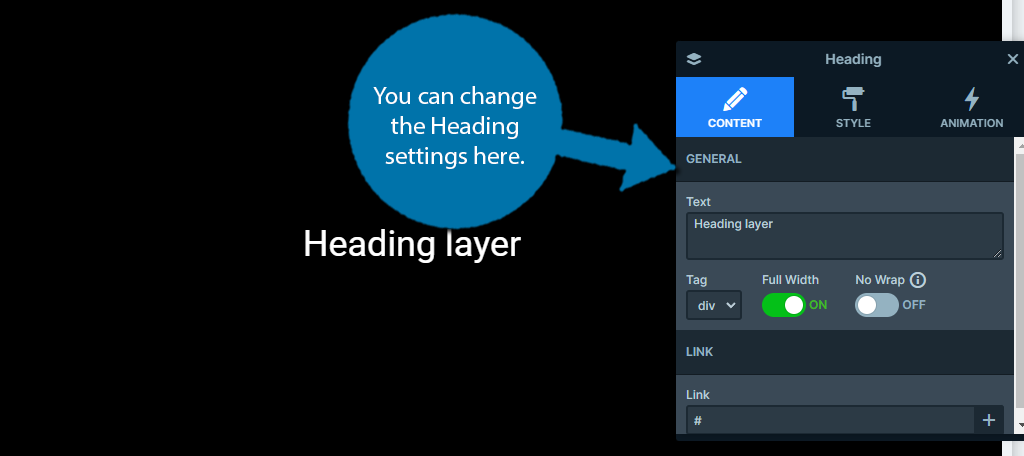
The heading layer itself is just like any other Heading. You can customize the text, make it link to another page, change the color, and more.
All of this is accessible in the settings popup.
To move the Heading layer or any item you add to the slide, click and drag it. Now, if you just tried to do that and it didn’t work, that is normal. The default elements you add cannot actually be moved.
Instead, you need to swap them to Absolute Positioning mode. To do this, click on that element, click on Style, and scroll down.
Locate the Position option and select Absolute.
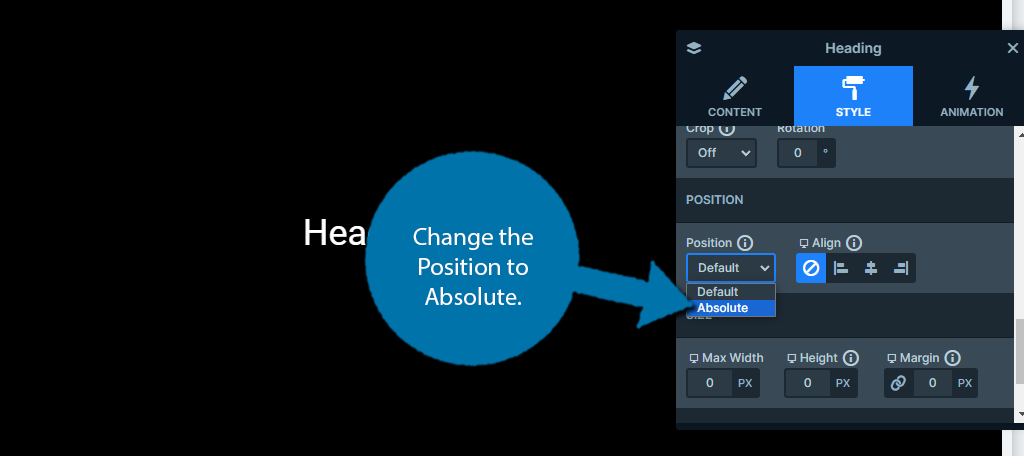
Now, you can freely drag the element to any location. This is true for anything you add, so I’ll only mention this once.
Obviously, this can get annoying doing this for every element, thus, you should just change the global slide setting to make this the default option.
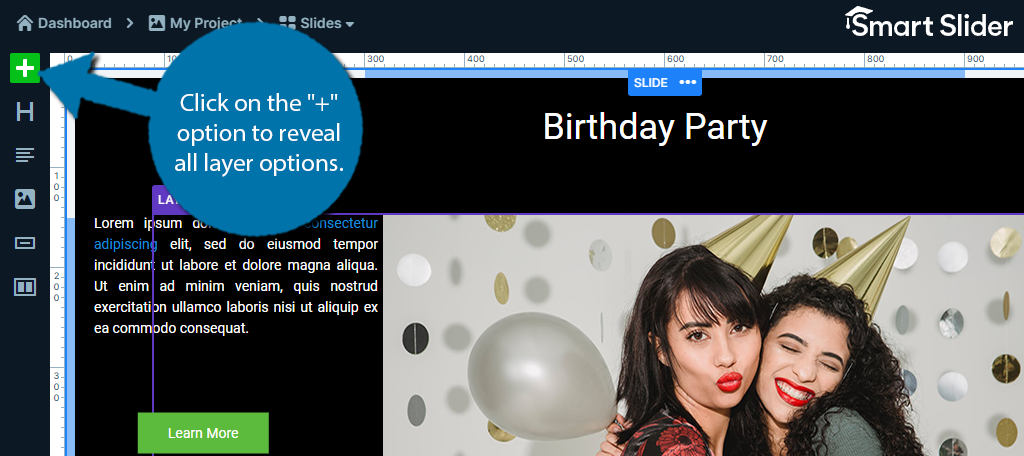
To do this, click on the “+” option to reveal all layer options.
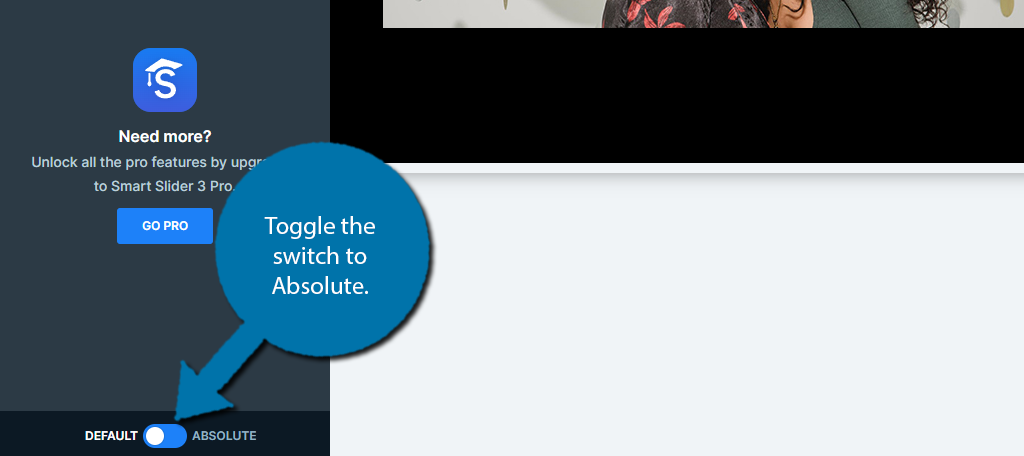
At the bottom, there is a switch that you can toggle to Absolute. This will allow you to freely move any element you add in Smart Slider 3.
As I said at the start, the rest of the elements work similarly to this with their own unique quirks. You can add headers, text, images, buttons, rows, columns, and video content (from YouTube or Vimeo) in the free version.
Simply add the content to your slides until you are satisfied.
Step 7: Displaying Your Presentations in WordPress
Once you have your slideshow completed, it’s time to actually display it in WordPress. This is done by using the shortcode located in the project dashboard. It looks like this:
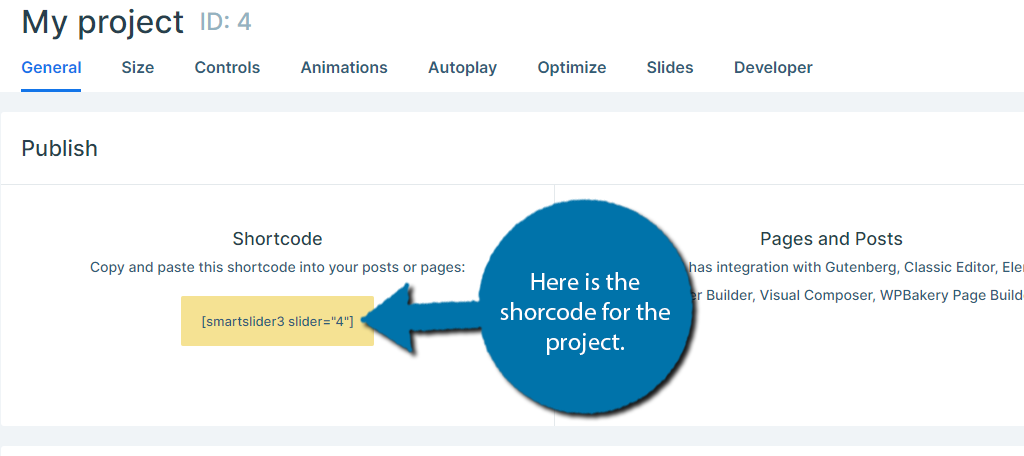
You can add this on any post, page, or widget area to embed your slideshow. In the case of a widget area, make sure that the slides are properly sized for such a small display area.
Once you add it to a shortcode block, you can view the presentation in WordPress.
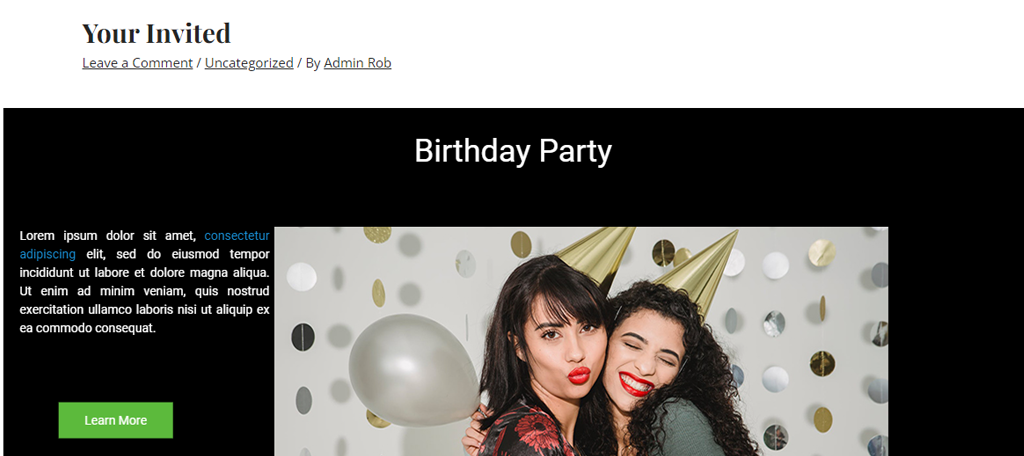
And that really covers how to build presentations in WordPress using Smart Slider 3.
How to Create Presentations in WordPress with Presenter
The Presenter plugin is another option to consider. It is not as robust as Smart Slider 3, but it is definitely worth considering if you are just looking to build simple presentations in a timely manner.
Everything is built using a classic editor format, which means it is very straightforward. You can easily add slides before and after each other. It also allows you to add speaker notes if this is for an actual, in-person presentation.
Again, it lacks a lot of styling options, so you won’t be making anything fancy. However, Presenter is a solid option.
Note: This plugin has not been updated in a year, but at the time of Writing, September 2023, the plugin was fully functional. I did run into one issue where the slideshow would not appear. I swapped my theme from Astra to Twenty-Twenty-Three and back and the problem fixed itself. Otherwise, there were no issues whatsoever.
Step 1: Install Presenter
Click on Plugins and select the Add New option on the left-hand admin panel.

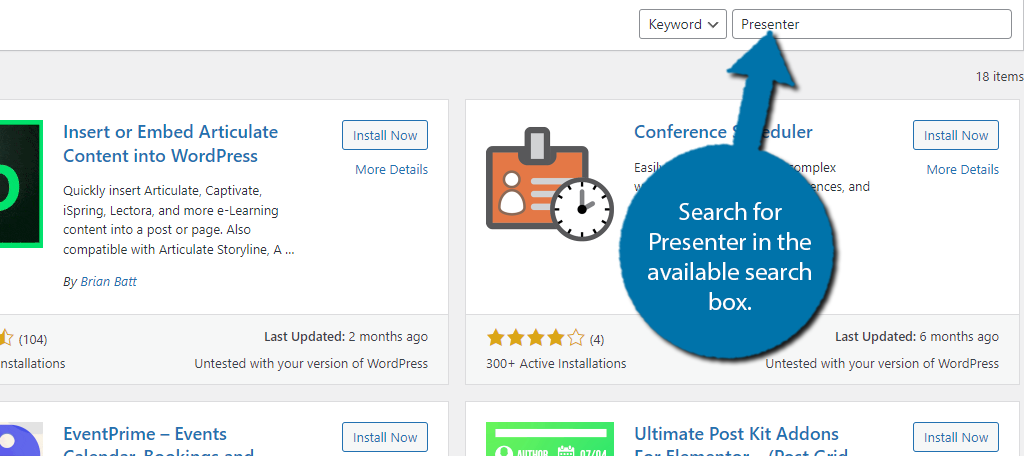
Search for Presenter in the available search box. This will pull up additional plugins that you may find helpful.
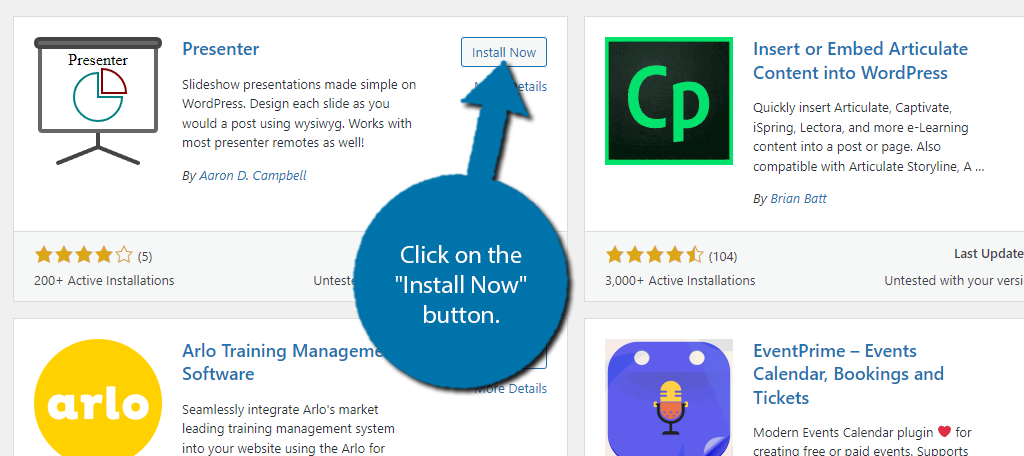
Scroll down until you find the Presenter plugin and click on the “Install Now” button and activate the plugin for use.
Step 2: Create A Slideshow Slide
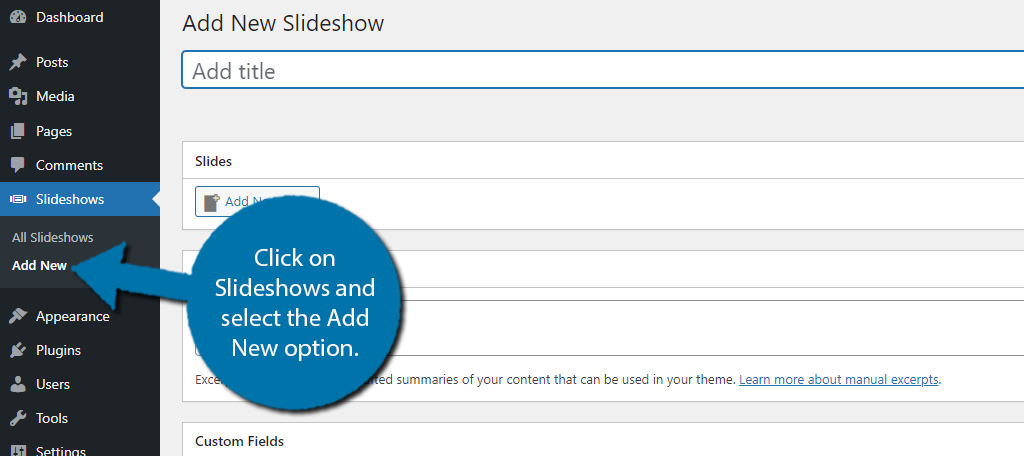
Presenter is a pretty simple plugin. To begin creating a slideshow, look for the Slideshows option on the left-hand admin panel and click it. Then select the Add New option.
Right at the top is a title for your slideshow. This is only visible to you, so create a name that helps you identify it from a list. After all, you can use this plugin to create as many presentations in WordPress as you want.
Once you add a title, click on the “Add New Slide” button.
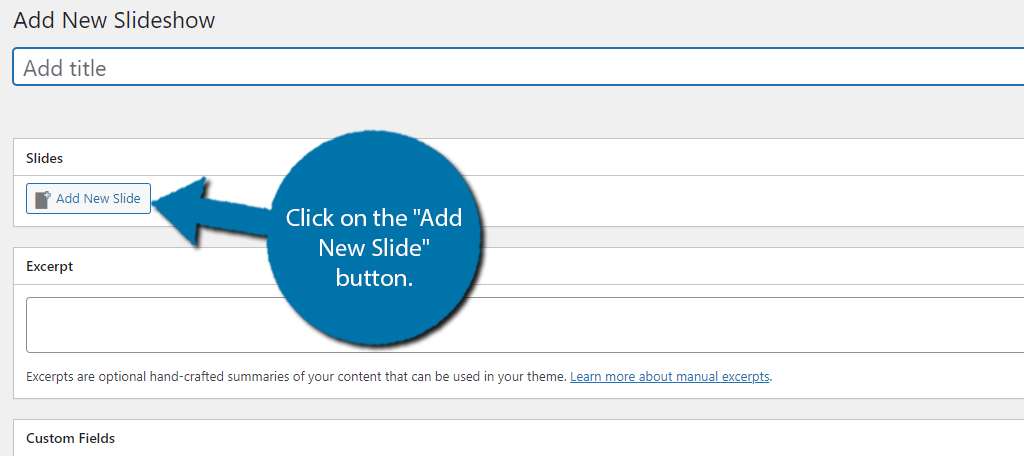
This will open up a field to edit the slide you added. The button you just clicked on is underneath this field, so feel free to click on it again to add as many slides as you need.
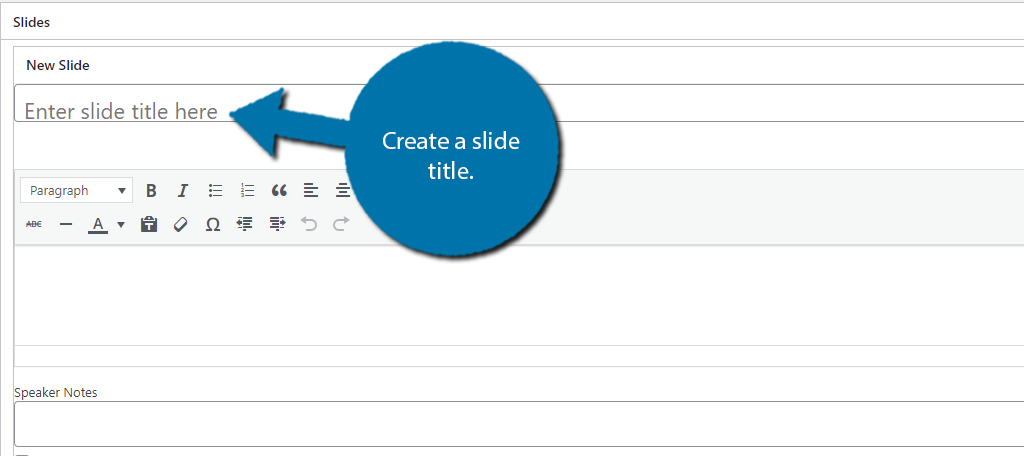
Step 3: Edit the Slide
With the slide created, it is time to start filling it in. The first thing is to add a slide title. Simply type the title into the appropriate box. You can also opt to leave this blank as it is not a required field.
Below this is the classic editor of WordPress. You can use it to add text and style it how you see fit. You can place images in the slide by clicking on the Add Media button. This will take you to the media library where you can select the image.
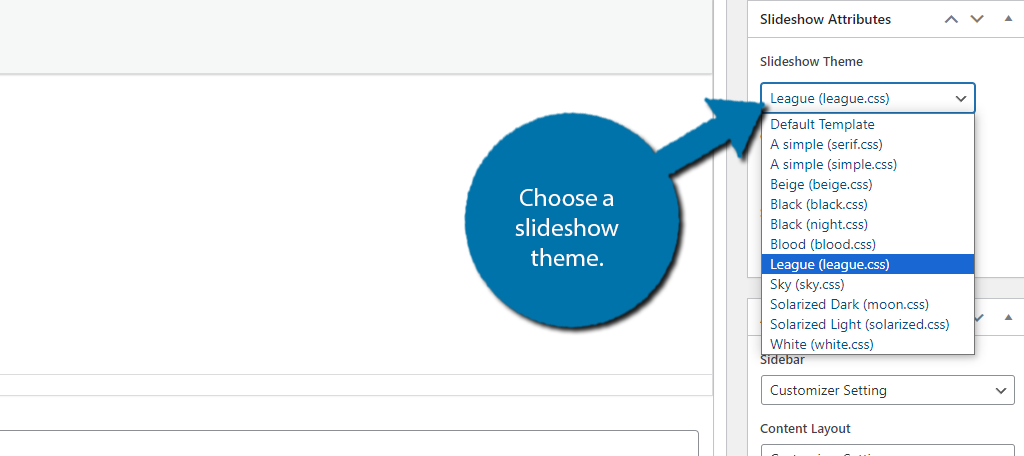
When it comes to the actual design of your slide, the plugin includes themes, but I do want to use that term loosely. You see, the themes are pretty much solid color backgrounds. They serve their purpose well enough.
You can change the theme for the slideshow on the right-hand side by using the theme drop-down menu.
You can’t actually see what the theme looks like in the editor, so just click on the Preview option once you select one to see it in action. Now, if you want to use a custom image as a background image, you can do that.
The plugin does not have any dedicated fields or buttons for this. Instead, you need to make your own using the Advanced slide options. But relax, it isn’t very hard.
Below the text editor, click on the Show Advanced Slide Settings option.
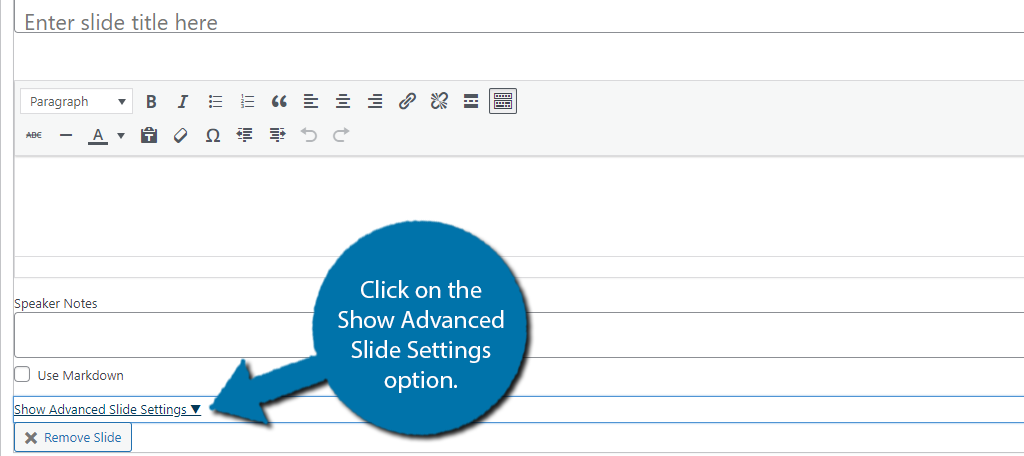
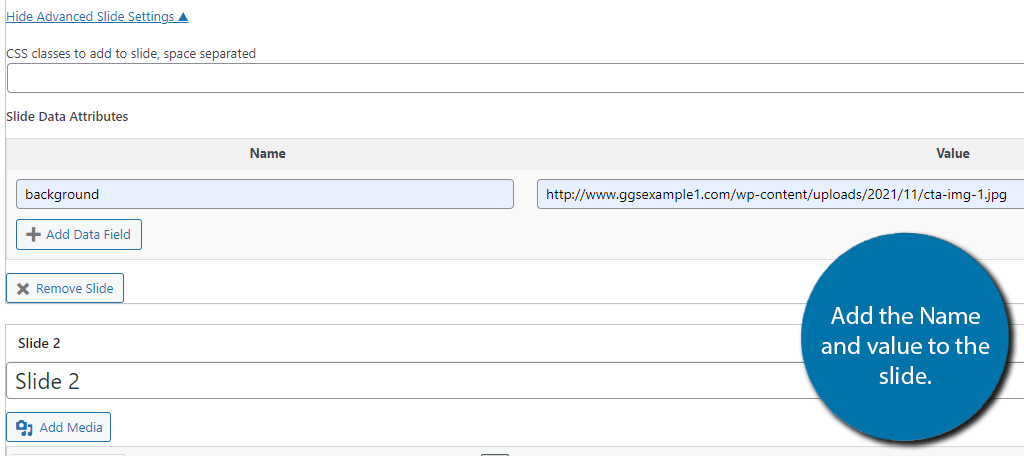
You’ll notice a CSS section that you can use to decorate the slide show if you are knowledgeable with CSS. More importantly, click on the “Add Data Field” button. This will add a simple data field that we can use to add images as the background of the slide.
First, in the Name field, type the word “background” into the space provided. Then you want to simply paste the image URL into the Value field. This is located in your media library.
It will look like this when it is filled in correctly:
When you are done, publish the presentation.
Step 4: Sharing Your Presentations in WordPress
What separates this plugin from a lot of others is that it doesn’t embed a presentation in a post or page. The presentation itself is the post or page.
Essentially, if you are going to share this, you just need to send the person the URL.
As such, it’s no different than sharing other links to your website. When you visit the link, you will see the full presentation, and you can switch slides by using the small arrow in the right corner.
And with that, you know how to build presentations in WordPress using the Presenter plugin. The plugin is great for creating simple slideshows in WordPress, but there are better tools like Smart Slider 3, or you could give Google Slides a try.
What About Using Google Slides?
Google has made itself the top competitor of Microsoft Office with its own suite of applications. One such offering is Google Slides, which is a presentation application users can access for free online.
It has several different features that separate it from PowerPoint, with the main benefit being collaboration.
PowerPoint itself is an offline application, while Google Slides is an online tool where multiple users can edit the same file. Thus, it is perfect for group projects and can help improve efficiency compared to using PowerPoint.
It’s also important to point out that not only is Google Slides free to use, but you can also store your files online for free and access them anywhere, while PowerPoint is locked behind a yearly paywall (unless you are a student).
The good news is that you can embed Google Slides into WordPress. The process is quite easy, as essentially it just requires you to copy a code from Google and paste it into an HTML block in WordPress.
Add Your Presentations to WordPress Today
As you can see, WordPress has several plugins that can help you build impressive presentations without having to use PowerPoint. You also have the option of using alternatives such as Google Slides and embedding them directly into your site.
That said, while all of these alternatives exist, it is worth pointing out that PowerPoint is the go-to for presentations around the world, especially in educational fields. As such, there is value in using it.
There are several plugins you can use to embed PowerPoint files in WordPress, but as you can see, you are not limited to it.
Which plugin do you use to build presentations in WordPress? Why do you not want to use PowerPoint?